Plug & Play Solar Panels: Installation and Profitability
Producing your own electricity has become accessible to everyone thanks to 'Plug & Play' solar kits. Discover how it works, how to install them, and how much you can save.
Recommended Materials
- Plug & Play Solar Kit
- Waterproof outdoor socket
- Ballast (concrete slabs or sand)
- Smartphone (for production monitoring)
- Basic mounting tools
Steps to follow
Step 1
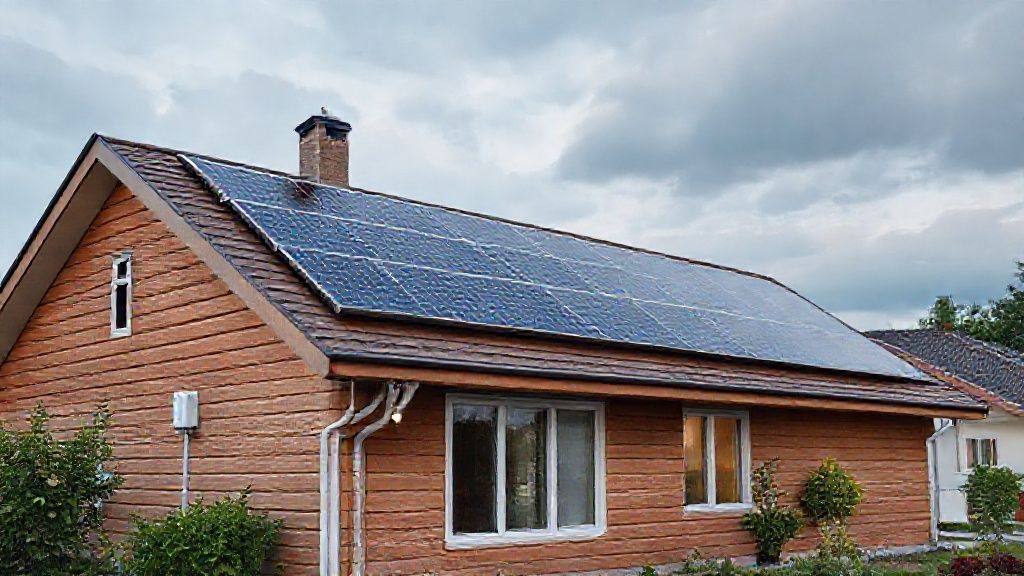
The principle of 'Plug & Play' solar is revolutionary in its simplicity: a kit composed of one or two solar panels, a micro-inverter already attached to the back, and a cable with a standard electrical plug. You plug the panel into any socket in your house, and the electricity produced is injected directly into your home network. Electrons go to the shortest path: they will be consumed by your appliances on standby or running (fridge, internet box, VMC, chargers...).
Step 2
Choose the location carefully: ideally facing south, without any cast shadow (trees, chimneys, neighboring building) between 10am and 4pm. You can install it on the ground in the garden, on a terrace, a balcony or a flat roof. The inclination is often adjustable via the supplied support to optimize production (more vertical in winter to capture low sun, flatter in summer).
Step 3
Physical installation takes less than an hour and does not require an electrician. Assemble the metal support, fix the panel on it, and imperatively ensure to ballast it well with heavy weights (25kg gravel slabs, sandbags) so that it does not fly away at the first gust of wind. Safety is paramount.
Step 4
Plug the cable into an outdoor socket connected to the earth. The micro-inverter will flash to synchronize with the network frequency (this takes a few minutes for safety) and start producing. That's it! Your Linky meter will automatically slow down.
Step 5
Declare your installation: in France, it is a legal obligation but very simple. Fill out a Self-Consumption Convention Without Injection (CACSI) online on the Enedis website. It is free and allows the network manager to know that there is production at this address.
Step 6
Follow your production via the supplied app (often a Wifi smart plug is included in the kit). You will see in real time the watts produced and the savings made in euros, which is very fun and motivating to adapt your consumption (start the washing machine when there is sun!).
Frequently Asked Questions
Is it profitable ?
Yes. For a 400W kit (cost about 400-700€), the return on investment is generally between 4 and 6 years depending on your region and the price of electricity. Knowing that the lifespan of panels is 25 years, it is very profitable.
What happens if I produce more than I consume ?
The surplus is injected for free into the public network (it is lost for you, you gift it to the community). The goal of these kits is to erase your 'consumption heel' (background noise), so one or two panels are generally enough to cover this heel without having too much surplus.
Precautions
- Never plug the panel into a basic power strip.
- Check that your electrical installation is up to standards (socket with earth mandatory).
- Watch out for the weight of the kit if you install it on a balcony.